VeraCrypt
The software VeraCrypt is required for all methods mentioned here. This means that this program must be installed on your PC in order to encrypt and decrypt (reopen) encrypted storage, such as folders or USB sticks.
Encrypt entire hard drives/USB sticks or folders with VeraCrypt
There are two main ways to encrypt an entire USB stick or hard drive:
- Create and encrypt a folder that is as large as the entire storage medium.
- Encrypt the file system of the hard drive itself.
Because a lot can go wrong with option 2, we generally recommend option 1. This should not have any disadvantages. This also means that with option 1, the process for encrypting individual folders or the entire USB stick/hard drive is identical.
However, if the device to be encrypted is formatted with FAT32 and is larger than 4 GB, this will not work, which is unfortunately often the case.
Details about FAT32
Details about FAT32
New USB sticks are often delivered with FAT32 formatting. This is a problem since files larger than 4 GB cannot be stored on FAT32 and similar formats.
Since the USB stick is probably larger than 4 GB, option 1 would also require a file (in this case - the encrypted folder file) larger than 4 GB to be created on it, which will fail in this case.
If your storage medium has this type of formatting, it must either be reformatted for option 1, which requires other software, or option 2 must be selected.
By formatting your drive, you will lose access to your data. However, authorities might still be able to recover it. The following are instructions for reformating your device to exFAT:
From now on, we will describe both options in parallel. If there are differences between the two options, they will be marked with the headings “Option 1” or “Option 2.” The rest applies to both options.
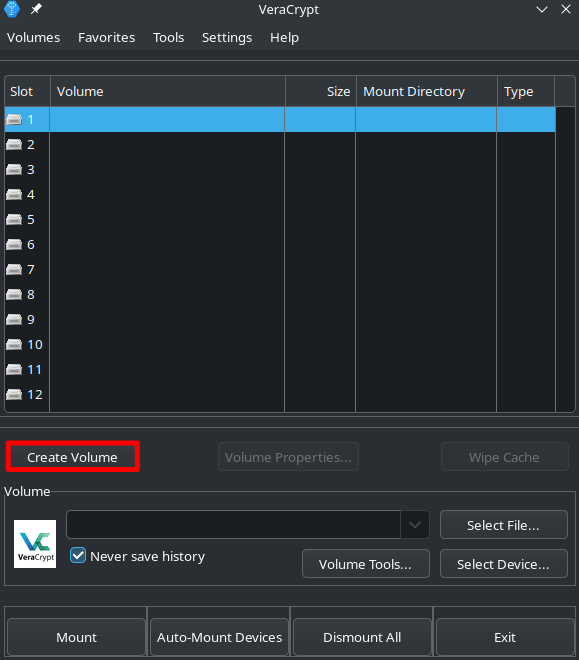
Open VeraCrypt
- Click on
Create Volume
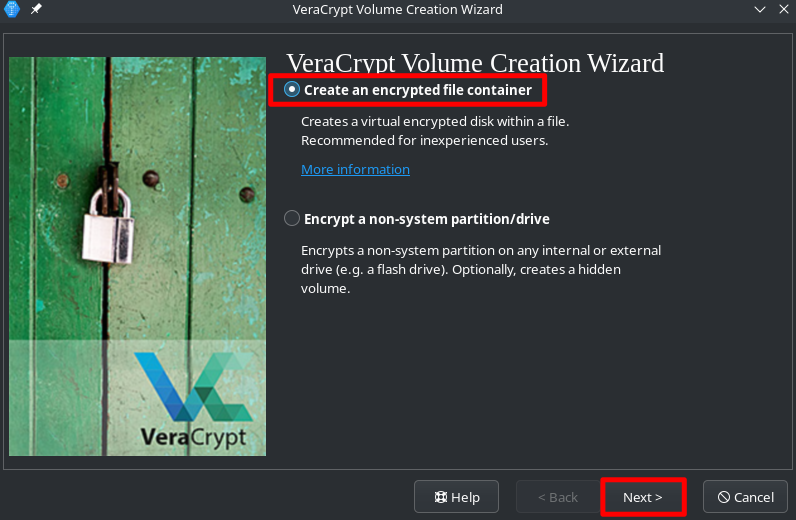
Option 1: Create file for encrypted container
The encrypted “folder” is actually just a file, called a container in VeraCrypt. We can only use it later as a normal folder when it is opened and decrypted via VeraCrypt.
- A VeraCrypt container is just a file for the PC
- For us, the container will look like a normal folder when decrypted
- Here, we select a “Encrypted file container”:
Next>
- Then select
Standard VeraCrypt VolumeandNext>
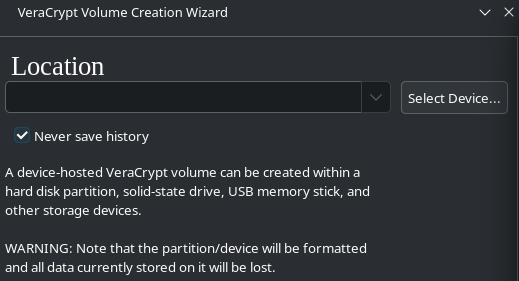
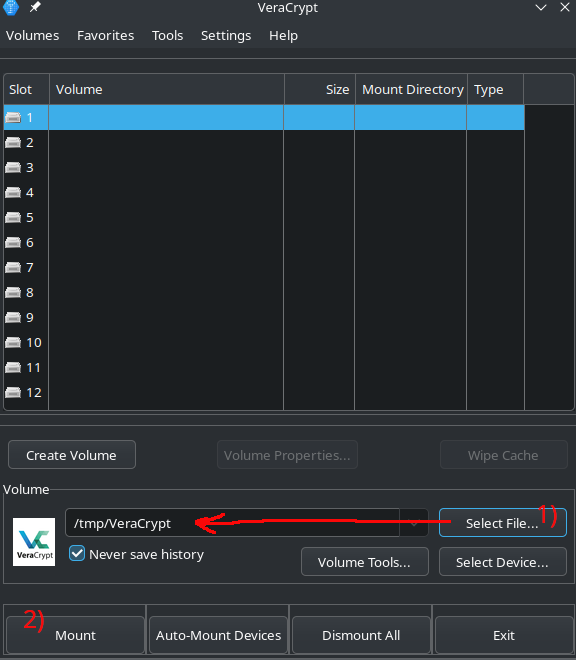
Under the Location menu, we now select the location where VeraCrypt should store the container for us. This should, as said, be our USB stick/hard drive.
- Fist click
Select File - This will open the file manager. Navigate to the USB stick/hard drive that you want to encrypt.
- Now we create the container, which will later become our encrypted folder. Enter a name for the file in the field provided. The name is technically irrelevant, but it will be the name of the file that you will see later when you simply insert the stick and open it.
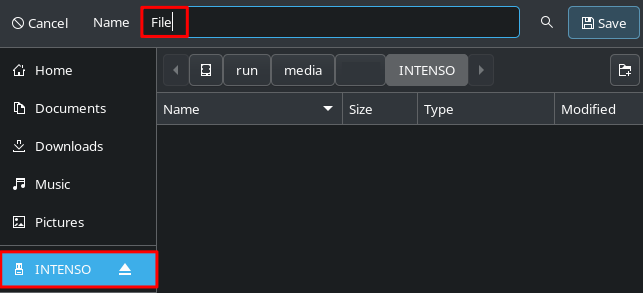
- Confirm with
Save
Option 2: Encrypt the entire file system
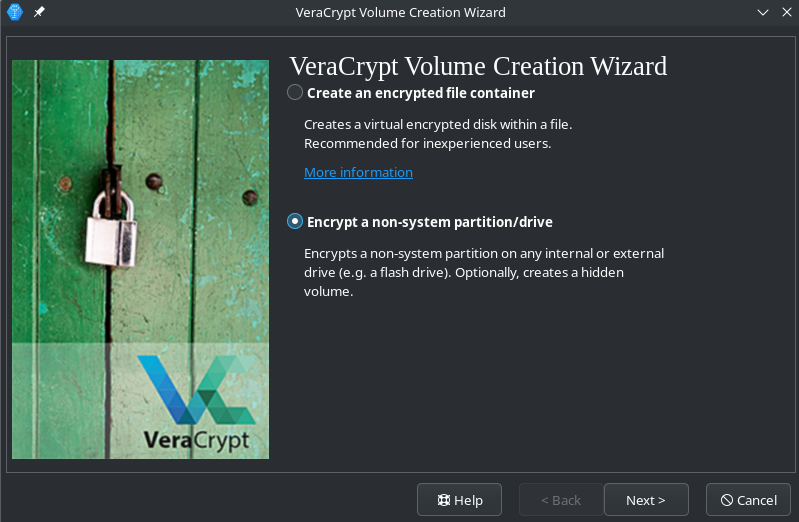
Standard VeraCrypt Volume>Next>
Now we have to select the storage medium.
The list now shows all available storage media connected to the computer, including other hard drives, USB sticks, SD cards, etc.
All files on the device selected here will be irretrievably deleted, so make sure you select the correct device!
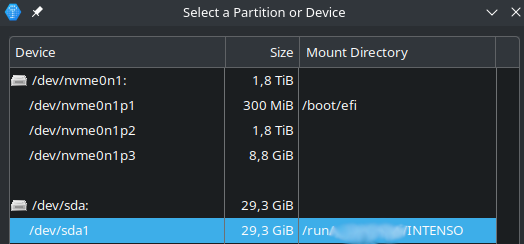
It is usually helpful to look at the storage size to identify the correct stick. If you want to encrypt a hard disk that may be the same size as other connected storage media, you must look at the path/mount points, which can include the name of the device. In the above screenshots you can see two devices with 3 and 1 partitions: nvme0n1* and sda*. The listings directly below them are their separate partitions.
For example here, the upper nvme0n1 device is a 1.8TB (~2TB) large SSD, while the lower sda one is a 29,3GB (~32GB) USB drive.
If you are still not sure which device or partitions is the correct one, remove the device you want to encrypt and check the list again. The ones that still show up, are not the right ones!
- Once you are sure which device should be encrypted, confirm the warning that all files on the selected device will be destroyed.
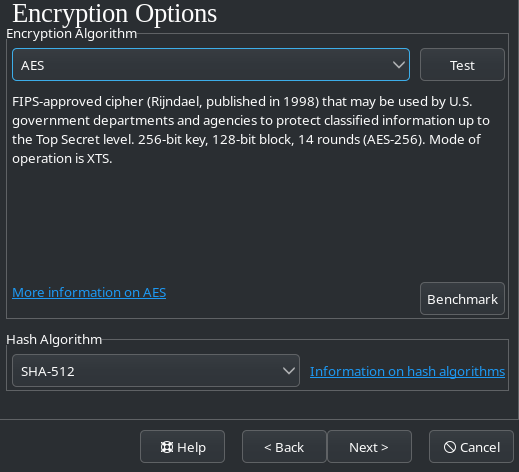
Encryption Options
The default settings should suffice. Explaining the technical details would go beyond the scope of this guide. If interested, you can read more about the different encryption algorithms here.
- Click
Next>
Option 1: Volume Size
Here we specify how large the container (folder) should be later. You can choose any size depending on the amount of free storage space available.
Just keep in mind that if you want to put a file that’s 100 MB in the folder later, you should choose a bit more space here, like 110 MB. That’s because the encryption itself takes up some space.

Option 1: Folder as large as the entire stick
As you can see in the image above, there is an extra checkbox to use all available space for creating the container (folder).
Example
Example
So if there is already 1 GB of data on a 4 GB stick, the new container will be 3 GB with this option and the existing data will remain intact.
This is why we chose the first option at the very beginning, because with the second option, all data will be deleted if, for example, the wrong hard drive is selected.
A warning appears stating that files larger than 4 GB cannot be stored on FAT32. You can simply click OK here, if you made sure, that your drive is not formatted as FAT32.
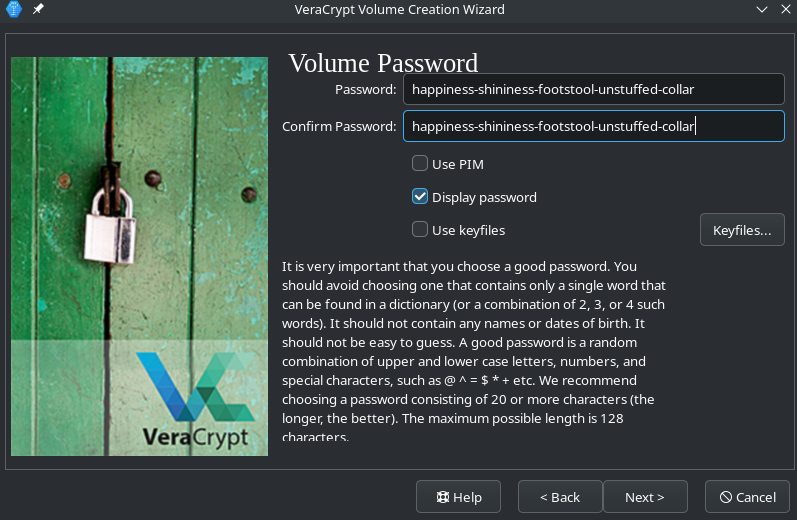
Set password
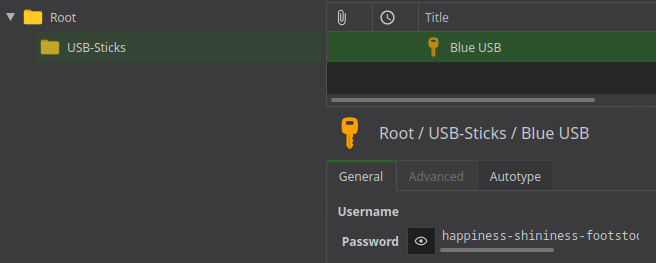
Here you can set the password that will be used to encrypt the container. You should choose a strong password, otherwise it can be easily guessed.
It is best to generate and save a password using a password manager such as KeePass:
File system settings
Now we are asked whether we want to store files larger than 4GB in our folder.

If you are sure that you do not want to do this, click no, otherwise click yes.
Next, a file system must be specified.
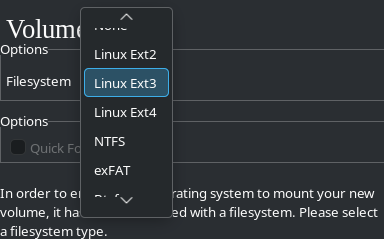
- Select
exFATif you want to use the storage on Windows computers. - Select
ext4if you only want to use the storage on Linux and MacOS. - Select
NTFSif you only want to use the storage on Windows and Linux. Although NTFS is not made for Linux itself, Linux can handle it fairly OK.
The respective platforms may be able to handle all formats, but these recommendations should work without any problems.
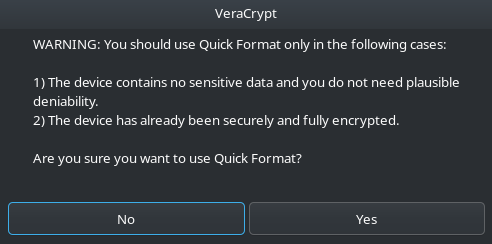
Quick Format
The checkbox next to Quick Format is usually only available for option 2. It means that the storage will not be overwritten with random bits during encryption. The advantage of this is that, especially for large data carriers, the encryption process is extremely shortened and only takes a few seconds.
However, this also brings uncertainties with regard to security, which is why we only select this option if:
- No sensitive data has ever been stored on this storage medium. (Never really means never, see Data hygiene), or
- The storage medium is already encrypted, its password is not known to any adversary, and it is only being encrypted “again” (for whatever reason).
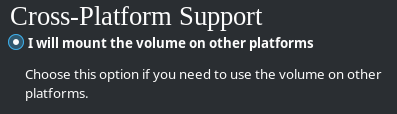
Next, specify whether you want to use the storage medium on operating systems other than your current one (if in doubt, always select this option, just in case).
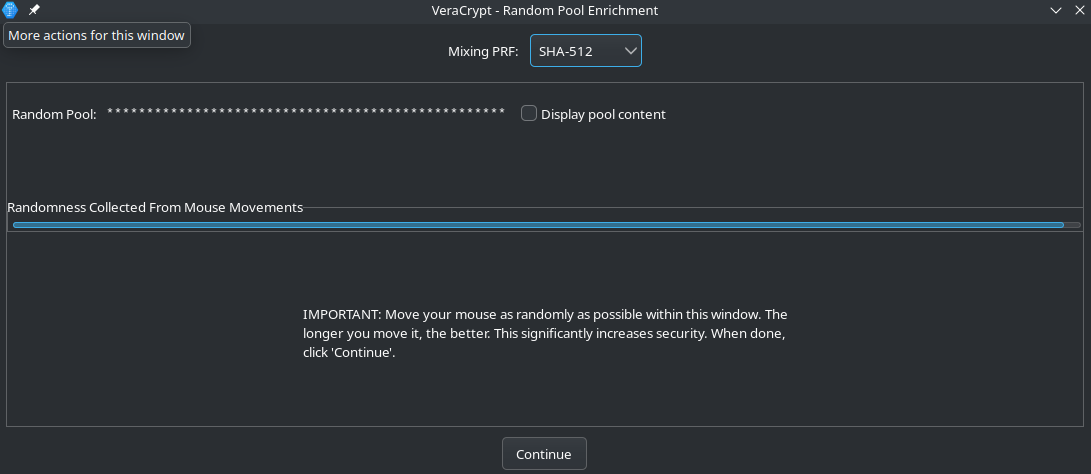
Random generator
The “Random generator” window will now open. Without going into further detail, it should be noted here that good encryption depends on randomly generated data being “mixed in” with the encryption.
Since computers are not perfect at this, VeraCrypt asks you to make random movements with your mouse in the window. This slowly fills the blue bar under “Randomness Collected From Mouse Movements.”
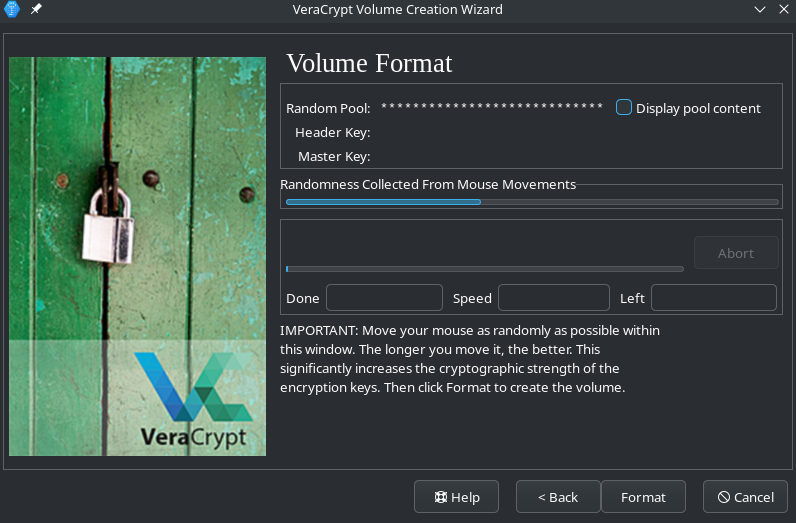
The bar should be at least half full. The more the better!
- Click
Next>once the bar is full enough
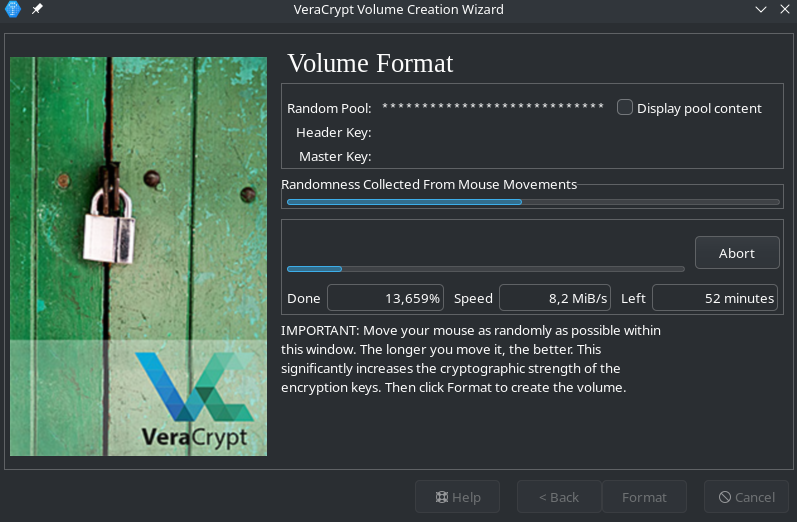
Encryption process
VeraCrypt now begins to encrypt the file in the specified size and with the selected settings. To do this, it first writes random “ones” and “zeros” to the entire container (unless Quick Format is selected). Depending on its size and speed, this can take from a few minutes to several hours.
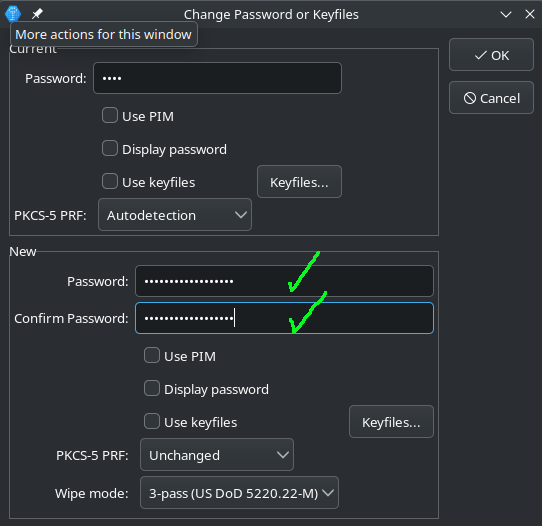
Change password later
You can also change the password of a VeraCrypt container later.
- Mount container
- Click
Change Volume Password
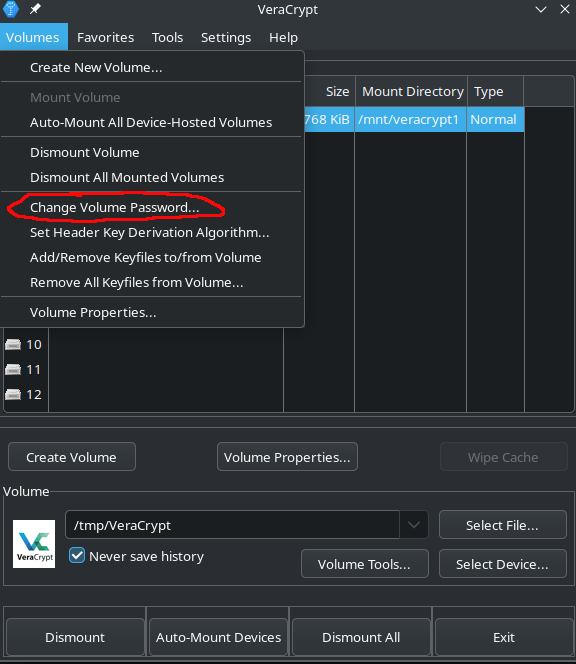
- Enter the old password at the top and the new password twice at the bottom. _(Tip: Generate and save passwords with a password manager)
Feedback: You have feedback for esc-it.org? Feel free to use our short feedback form.